
|
|
|
|
|


Mad Scientist Body Parts
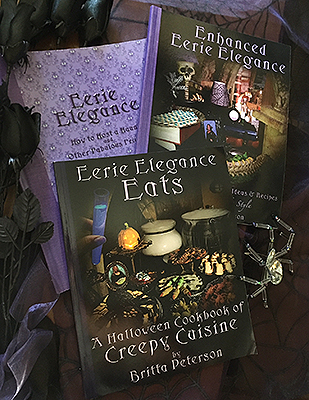
(featured inside the book Eerie Elegance)
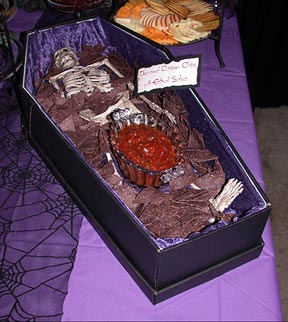
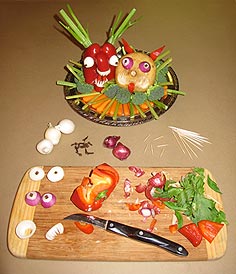
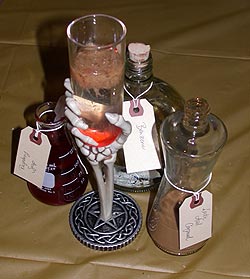
My repertoire of recipes has acquired more and more body parts over the years, and since my Mad Scientist display has also grown recently, I have begun to arrange all the edible body parts together as a mad scientist experiment in process, complete with microscopes, notebooks, periodic tables, and lab coat hanging on the wall waiting for the doctor to return. Not only does this enhance the mad scientist theme nicely, but it also frees space other tables for even more food, especially when guests bring their own revolting recipes! :)
The Eerie Eyeballs, Bizarre Brain, and Haunted Human Heart are featured separately in this list. The bleeding hands are made in the same way as the Haunted Human Heart, just using peach gelatin with evaporated milk as the flesh, with the same raspberry blood syrup in a baggie bladder inside. The green substance in the large jar is an assortment of Gummy Body Parts purchased candies suspended in green "ectoplasm" soft-set lime gelatin. Deliciously disgusting!

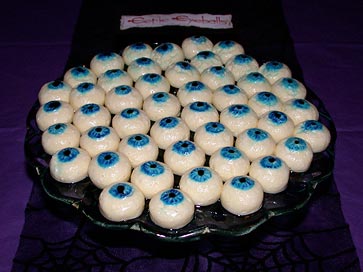
Easier Eerie Eyeballs
(featured inside the book Enhanced Eerie Elegance)
I made my original Eerie Eyeball recipe the same way for years, and since I would multi-task stirring the eyeball goop melting the marshmallows and cream cheese while doing other party prep tasks, I never realized how long it really took until I filmed it. I was horrified and vowed that I would simplify the recipe! Here is an easier recipe that does not need a double-boiler or hand mixer and melts much more quickly, but also includes an easier painting technique.
2 packets (2 Tbsp) plain powdered gelatin in 1 cup tepid water
(or 8 sheets plain leaf gelatin)
8 oz (one brick) cream cheese (can be Neufchatel)
1 10oz jar marshmallow creme (or 1 cup mini marshmallows)
1 cup cold pineapple juice
truffle candy molds or similar half-sphere molds
food coloring for irises (your choice of color)
black food coloring for pupils
piping tip or similar size lid for iris outline
solid small dowel, pen, or similar size flat round end for pupil
fine soft watercolor brush
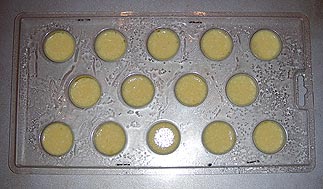
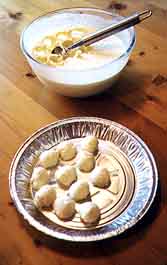
Bloom gelatin first in tepid water. Put cream cheese into saucepan over medium heat and stir until smooth. Add marshmallows and stir until completely melted. Using marshmallow creme instead of mini marshmallows makes it melt even easier. After cream cheese and marshmallow mixture is smooth, stir in the bloomed gelatin until completely combined. Add the cold pineapple juice last, mixing again until smooth. The goop will be very runny, but after chilling it will set up into eyeball texture without being too chewy. Pour into molds and chill in fridge until set. You may still use the original melonballer technique to scoop eyeballs from a deep container after setting, but molds are much EASIER. This full recipe makes 9 dozen truffle-mold eyeballs, however this new recipe can be easily divided in half!
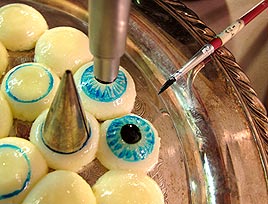
After eyeballs are set, gently unmold and arrange on the serving tray. Set out food coloring on a plate or tray. Use the watercolor brush to spread a good layer of iris color large enough for the back opening of the piping tip. Dip the back opening of the piping tip into the food coloring and twist. Aim center above one eyeball, gently lower onto the eyeball surface, and gently twist to apply consistent color in a full circle. Use the watercolor brush to gently brush lines from the circle inwards, leaving white space towards the center. Dip the back of the pen into black food coloring, making sure none will drip. Gently lower the pen into the center of the painted eyeball, twisting gently to transfer all the black in a clean circle for the pupil. If the eyeball surface isn�t smooth, gaps may appear in the pupil, then you can touch up with the brush if you like. Refrigerate until you are ready to serve to your eyeball eaters.
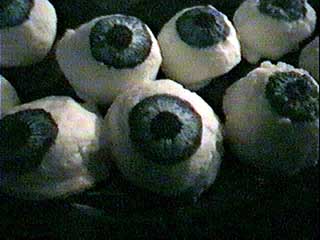
Eerie Eyeballs
(featured inside the book Eerie Elegance)
Yields approximately 9 dozen bite-sized eyeballs
3 oz (small box) lemon gelatin powdered dessert mix
(can be sugar-free gelatin dessert mix which will be less weight listed on the box label)
1 cup hot water
1/2 cup miniature marshmallows
1 cup pineapple juice
8 oz cream cheese (can be lowfat Neufchatel)
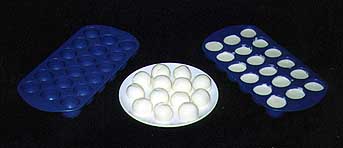
Dissolve lemon gelatin in 1 cup water in double boiler. If you don't have a double boiler, use a metal or glass bowl that fits in aon pan of boiling water. Add marshmallows and stir to melt. Be patient and keep stirring since this will take awhile until the marshmallows are completely dissolved. Remove from heat. Add pineapple juice and cream cheese. Beat with a mixer or whisk until well blended. Cool slightly. If you have truffle candy molds or round ice cube trays, spray them with non-stick cooking spray first, then pour the mixture in the molds and leave to set in the refrigerator. Otherwise pour into a deep ceramic dish and chill until thickened and firm enough for scooping into eyeballs. Using a melonballer, scoop full balls of the mixture and set aside for decoration. If you are using the melonballer method, you might need to add one package of plain gelatin powder to your mixture. The molds work fine with just the lemon gelatin to make gently squishy eyeballs.
To decorate the eyeballs, use liquid food coloring and an old detail paintbrush and get creative. You will need black food coloring for the pupils. Do not use food coloring pens because they will rip the delicate surface of the gelatin. Start with your iris color, paint the outside circle of the iris, then using as dry a brush as possible, pull the brush from the circle edge inward, getting lighter towards the center, and leaving white space between brushstrokes for the striated effect of a real iris. Paint all the irises, then the first eyeballs will be dry enough to start adding the black pupils. Refrigerate until serving, but remember that the longer your decorated eyeballs sit, the more the coloring will bleed into the gelatin and your detail becomes fuzzy. Wash your brush well and keep it as your food decorating brush. You can paint whatever colors you like for the irises, but I keep mine all the same color to save time, plus I have a good story why. I was asked once why all my eyeballs were blue, so I informed them that after freezing the melanin breaks down so no matter what the original color, all eyeballs become blue. I know this from years of dissecting cow eyes with my teacher mother since all those brown cow eyes became blue, but it was even more shocking to my guests that I even knew that fact!
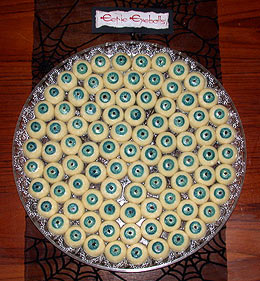
I did find rubber ice cube trays that worked beautifully with much less waste than the melonballer technique. I sprayed the rubber trays with non-stick cooking spray beforehand like you would any gelatin mold, let the gelatin mixture sit in the refrigerator to set, then I was able to carefully pop the eyeballs out to paint them. Some of the eyeballs did break, and they do have one flat side, but that works well, since then they don't roll around while you are trying to paint them. The ice cube holes were deep enough to be difficult to clean, and I learned the hard way they were not dishwasher safe. Since 2001 I have found that truffle candy molds are even better, since the swirl design on the top is the right size for the cornea shape on the eyeball. When using the truffle molds, one recipe makes about 9 dozen eyeballs, which is plenty for a party crowd!

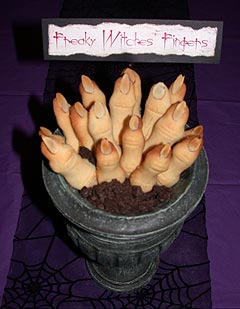
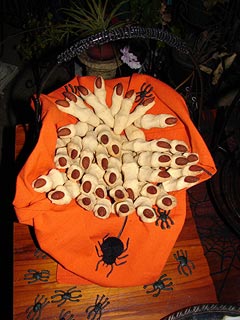

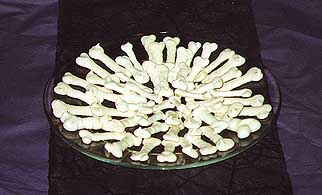
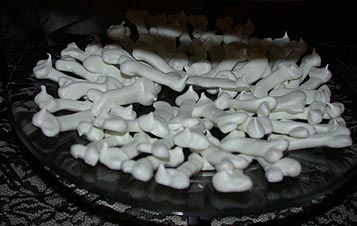
Brittle Meringue Bones
(featured inside the book Eerie Elegance)
3 large egg whites
1/4 tsp. cream of tartar
1/8 tsp. salt
2/3 cup white sugar
1/2 tsp. vanilla
Preheat oven to 200F. Line cookie sheet with brown paper bag or parchment. In a medium sized bowl at high speed, beat egg whites, cream of tartar and salt till fluffy. Gradually beat in sugar. Add vanilla. Place in pastry bag fitted with a medium plain piping tip. Pipe 3" bone shapes onto parchment or brown paper bag. Bake 1 hour until set. Turn off oven, dry in oven 1 hour. Be sure to store in airtight containers or they will become soggy. Makes 4 to 5 dozen small finger-sized bones.

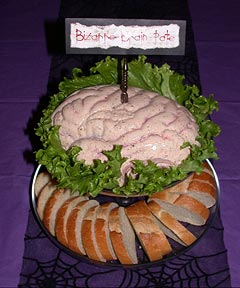
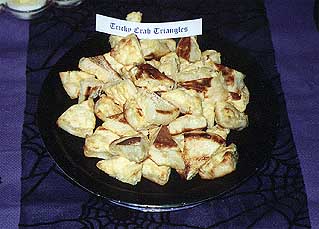
Bizarre Brain Pate
(featured inside the book Eerie Elegance)
1 (10 3/4-ounce) can cream of mushroom soup
8 ounces Philadelphia cream cheese, softened
1 (.25-ounce) envelope unflavored gelatin, softened in
1/4 cup water
1 bunch green onions, chopped
3 pounds cooked shrimp, coarsely chopped
(or 1 pound crab meat)
1 cup mayonnaise
1 Tablespoon lemon juice
Tabasco or creole seasoning to taste
Heat soup, undiluted, and mix in the cream cheese. Stir in softened gelatin and blend well. Fold in remaining ingredients and pour into a lightly-oiled mold. Chill until firm and serve with your favorite crackers.
I originally found this recipe for MardiGras 2000, which was quite yummy. When I got a brain mold for my birthday - can you tell my friends know I love Halloween? - I started thinking of what I could use for making a brain. Since the brain mold is only about 3 cups, I halved this recipe except for the amount of gelatin, left out the green onions, and finely chopped the shrimp in a food processor into more of a paste for the sake of making it look more smooth-textured like a real brain.

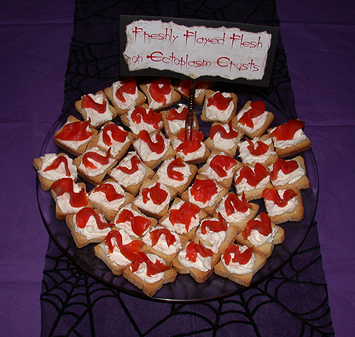
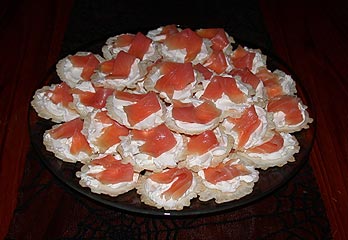
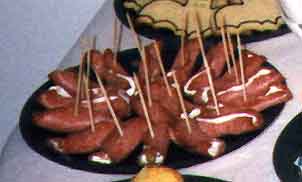
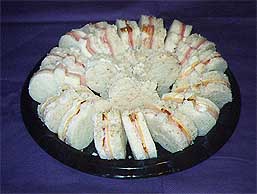
Freshly Flayed Flesh on Ectoplasm Crusts
(featured inside the book Eerie Elegance)
Makes about 3 dozen bite-sized appetizers.
1 package oil-packed sliced smoked salmon
1 package cream cheese (can be Neufchatel)
1 package crackers, melba toasts, bagel chips, or be creative!
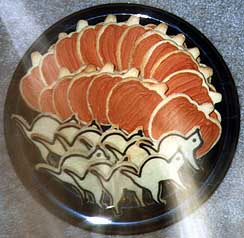
Cut the smoked salmon into small thin strips. Spread a dollop of cream cheese on each cracker, then place a strip of smoked salmon curled on top of the cream cheese. This is another standard tasty appetizer just renamed to be gory for the season!

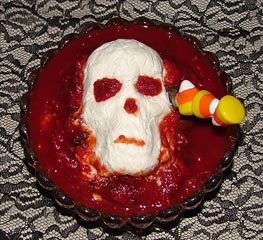
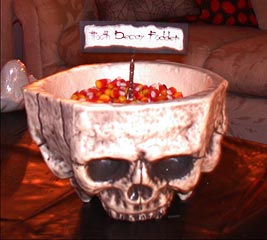
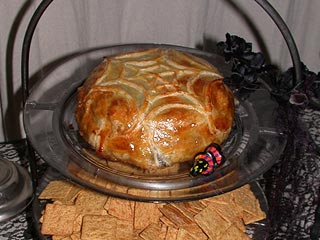
Sinister Skulls
(featured inside the book Eerie Elegance)
plastic wrap
1 small party favor plastic skull candy container
1 package cream cheese
1 jar chili sauce or salsa
crackers for spreading
Set the cream cheese out to thaw to room temperature. Line the inside of the plastic skull dish with plastic wrap leaving enough edges to wrap around later. Spoon the softened cream cheese into the plastic-lined skull dish, mashing in as much cream cheese as possible to pick up the most detail in the mold. Scrape any extra cream cheese off the top so it is flat. Close the plastic wrap over the flat cream cheese top and place in the freezer to set. Once set, remove the plastic wrap from the skull dish, and carefully wrap in foil to cushion the face shape. Line the skull dish with fresh plastic wrap to make more cream cheese skulls. Store in the freezer until night before the party, then thaw in the refrigerator. To serve, place the skull in a shallow dish, garnish with your preferred bloody salsa or chili mixture, including inside the eye sockets, and stab with your favorite spreader. You can extend the time before needing to refill by placing the skull on half a block of cream cheese, but cover the plain cream cheese with enough sauce so you can only see the skull above the "blood."

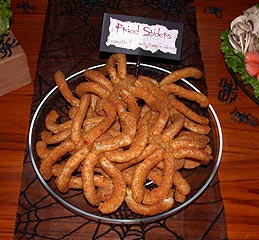
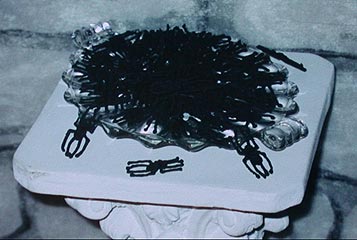
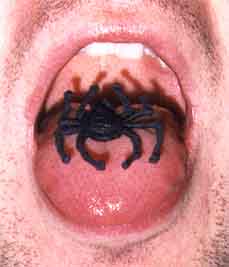
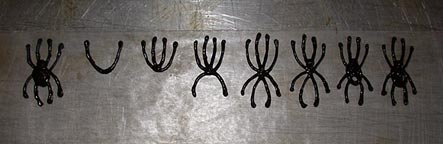
Fried Spiders
(featured inside the book Eerie Elegance)
Inspired by the traditional Cambodian delicacy, in 2003 I tried making my own Fried Spiders out of pre-made ingredients. They are quite fragile, but tasty!
For each fried spider:
1 frozen ready-to-bake breaded cream-cheese-filled jalapeno popper
4 frozen ready-to-bake breaded onion rings
egg wash
wooden toothpicks soaked in water
Thaw the jalapeno poppers and onion rings enough to be able to use toothpicks and knives on them. Cut the onion rings in half to make the curved legs. Attach the 8 legs to the jalapeno pepper body with egg wash and hold in place with the wet toothpicks. Bake in the oven according to the jalapeno popper package instructions, taking care not to burn the legs. Carefully arrange on a serving platter, since the legs might fall off, just like real fried spiders!


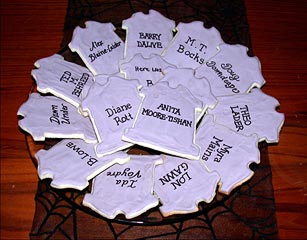
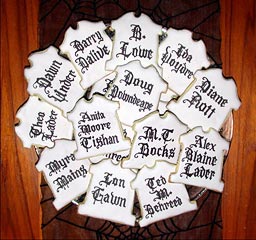
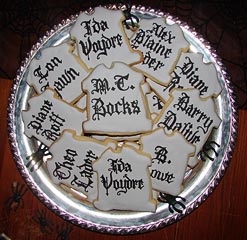
Spooky Sugar Cookies
(featured inside the book Eerie Elegance)
2 cups margarine or butter
2 1/4 cups sugar
3 eggs
1 1/2 tsp vanilla
6 cups flour
3/4 tsp salt
4 Tbsp milk (can use water)
Divide dough in half (or sixths). Only add milk or water if the dough is too dry. Chill 1 hour. Roll out half of dough 1/8 to 1/4 inch thick. Place on a greased cookie sheet and bake at 375F/190C for 12 minutes. These can be frosted. Makes about 5-6 dozen standard-sized cookie cutter shapes.


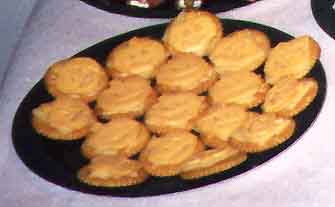
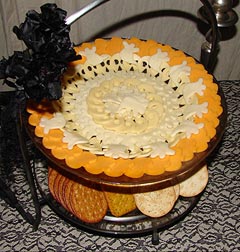
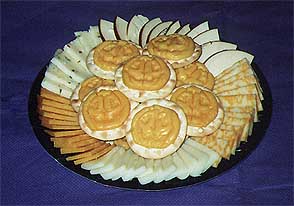
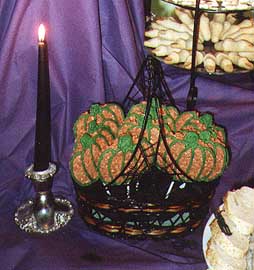
Creepy Cheese and Crackers
(featured inside the book Eerie Elegance)
your choice of cracker
orange cheese, preferably already sliced
a contrasting layer (I used white cheese slices)
For the version shown with the white background, cut the slices of cheese into cracker-sized squares. Cut the orange cheese into jack-o-lantern shapes by hand, or use a miniature cookie cutter if you're lucky (I wasn't lucky, so I cut all of these by hand). Lay the contrasting layer on the cracker, then top with the jack-o-lantern slice.
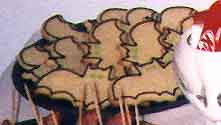
For 1999, I used a cookie stamp on melted American cheese while it was cooling in a flat cookie sheet. After it cooled thoroughly, I trimmed away the edges and had what you see above with the purple background.
For 2006 I finally had time to use my mini Halloween cookie cutters to cut the cheese shapes into white ghosts, orange pumpkins and white skulls.


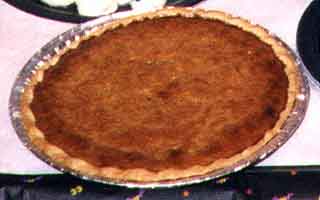
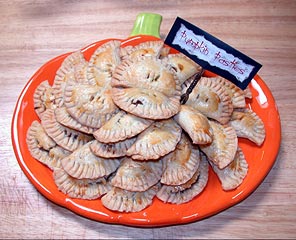
Pumpkin Pie
2 eggs, slightly beaten
3/4 cup sugar
1 1 lb. can pumpkin(2 cups)
1/2 tsp. salt
1 tsp. cinnamon
1/2 tsp. ginger
1/4 tsp. cloves
1 2/3 cups evap. milk(1 can)
1/2 tsp. allspice
One 9 inch pie crust, slightly cooked. (or 10 1/2 inch). Bake in hot oven (425F) for 15 minutes. Keep oven door closed and reduce temp to moderate (350F/180C) and continue baking for 45 minutes or until table knife inserted in center of pie comes out clean. Cool on wire rack. May be eaten cold or at room temperature and can serve with whipped cream.

Wicked Wraps
miniature sweet pickles
cream cheese
sliced salami
toothpicks
Cut the miniature pickles into fourths lengthwise, so that the pickle slices are still roughly the same length as the salami slices. Spread a thin layer of cream cheese on a slice of salami, wrap around a pickle slice and close with a toothpick.


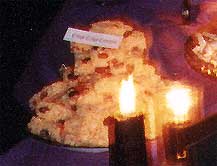
Creepy Crispy Crunchies
3 Tbsp margarine
4 cups miniature marshmallows
(or 10 oz large marshmallows, about 40)
6 cups rice crispy cereal
orange and brown Halloween M&Ms (about 6oz)
Melt margarine in a large saucepan over low heat. Add marshmallows and stir until completely melted. Remove from heat. Add cereal and stir until well coated. Add the candy and mix until candy is evenly mixed. Spray a pan with non-stick cooking spray or line with waxed paper. Using a buttered spatula or waxed paper, press the mixture evenly into a 9x13" pan. Cut into squares when cool.
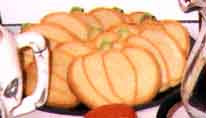
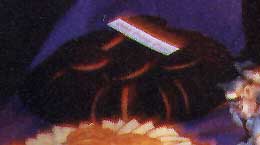
For 2000, since I got a jack-o-lantern lollipop pan for my birthday, I made the KrispyPops pictured above instead...

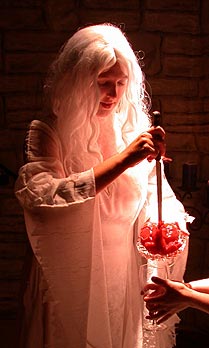
Haunted Human Heart
(featured inside the book Eerie Elegance)
It probably surprises no one that I have been a fan of Penn & Teller's brand of dark humor for years, so I had not only seen them in person including getting autographs, but also read their book 'How to Play With Your Food' (© 1992 by Buggs & Rudy Discount Corp.), so had seen their Bleeding Heart recipe and wanted to try it someday. I finally had my chance when I found a plastic human heart mold more than a decade ago at a specialty gift store around Halloween season. The mold came with a very similar recipe to make the gelatin opaque, but not any instructions to make it bleed, so I adapted Penn & Teller's recipe to create my own, and it has been one of my Halloween favorites ever since. You can find human heart molds online as well as at local Halloween stores. Penn & Teller used a Valentine's Day-style heart-shaped cake pan, but for Halloween I think using the human heart mold improves on their concept one-hundred percent!
I display my heart on a crystal pedestal plate, then use food coloring and a small brush to accent the veins. I even use red food coloring to shade the muscle contours, since it really does make a difference. One year I had a cardiology intern attend my party, and she said my gelatin heart looked very realistic. Needless to say I was very proud at such high praise! I use my large Psycho-style butcher knife to sever and serve my Haunted Human Heart.
For the heart:
1 large 6 oz box raspberry gelatin dessert
small 5 oz can of unsweetened evaporated milk (can use fat-free)
1 packet (1 Tbsp) unflavored powdered gelatin (or 4 sheets plain leaf gelatin)
1 cup boiling water
For the blood:
1/2 cup light corn syrup
1/2 cup raspberry syrup drink flavoring
1 Tbsp raspberry liqueur (optional)
1 drop blue food coloring
1 thin plastic non-zip sandwich bag
Thoroughly wash your mold, especially all the detail where the veins are. When completely dry, spray the mold with non-stick cooking spray. Use a larger bowl or crumpled foil around the outside to support your mold so the top surface will be level. Put the flavored gelatin in a large bowl and stir in 1 cup of boiling water. Stir about 3 minutes until completely dissolved. When slightly cooled, stir in the evaporated milk for one minute, otherwise the milk might curdle. Pour half of the mixture into the heart mold and refrigerate until it is soft-set, as the box instructions recommend for adding fresh fruit.
While the mold is setting, mix the corn syrup and raspberry syrup, plus raspberry liqueur if you like, with one drop of blue food coloring for a nice deep red blood color. Pour your blood into one corner of the thin plastic bag, squeeze the bag carefully to prevent air bubbles, then tie a knot so that the bladder will fit completely inside the rest of the mold, with enough space so gelatin will completely surround the bag. Trim the extra plastic off at the knot. Once the gelatin is soft-set and will support the bag of blood but without a skin on top of the gelatin, arrange the bag of blood, pour the remaining gelatin mixture up to the top of the mold, then refrigerate overnight. If you wait too long to add the remaining gelatin, the layers will not meld together, then your illusion is ruined when the top slides off the bottom, revealing your secret bag of blood!
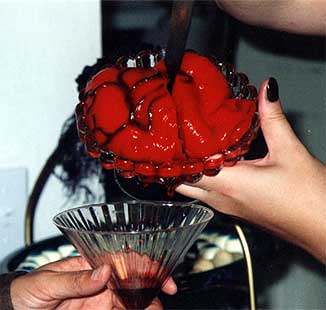
Once the gelatin is completely set, gently remove the heart from the mold and place on a serving plate, then use food coloring and a small soft watercolor brush to accent the veins. Use red food coloring to shade the contours of the muscle tissue, and blue food coloring to accent the veins. As you can see in the photo above, an unpainted heart is still alarming, but the accents make it so much more realistic. Refrigerate until the party, then display proudly, clarifying to all your guests that "Yes, that is our dessert!"
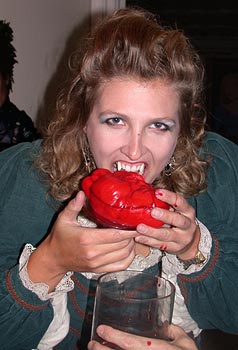
When ready to sever and serve, call all your guests to come watch the Haunted Human Heart. Enlist a volunteer to hold a glass or bowl to catch the spilling blood. Using a large knife, the scarier the better, stab directly down into the heart, making sure you poke the point of the knife into the plastic bag of blood. Twist the knife to widen the hole in the bag, then guide the knife down to cut a slice through the edge of the heart. Widen the opening in the heart so blood begins to flow. Gently tilt the plate so the blood can easily flow into the cup in your volunteer's hand as your guests all groan in disgust. If anyone actually wants to eat a slice, be careful not to serve any chunks of the plastic bag, and be sure to drizzle extra blood on each slice. If you have willing bodies, feel lucky, since I often have no one willing to eat any of my heart except me!
For anyone interested, I have left the original Penn & Teller recipe intact below...it's rather long, but VERY descriptive and detailed...
Penn & Teller's Bleeding Heart
Penn & Teller's
How to Play With Your Food© 1992 by Buggs & Rudy Discount
Corp.
The title says it all. It's the perfect coup de grace for your
intimate dinner at home. As your guests sip their coffee, you unveil a
glistening pink gelatin heart on a pedestal cake stand. Then you whip
out a carving knife and stab it. Dark, gooey blood issues majestically
from the wound. You cut dainty slices off the lobes of the heart and
flip them onto dessert plates. You hold each portion under the oozing
gash until it is nicely sauced with gore, add a dollop of whipped cream,
and serve.
INGREDIENTS
4 cups of water
four 3-oz. boxes or two 6-oz boxes of peach (pink; think of lung tissue)
or strawberry (redder; think of livers and hearts) gelatin dessert mix.
4 envelopes unflavored gelatin
one 12-ounce can unsweetened evaporated milk
1/2 cup grenadine syrup
1 cup light corn syrup
one small bottle (0.3 fl. oz.) red food coloring
3 drops blue food coloring
one 1-gallon food-storage bag (the plain kind without the zip closure)
6 1/2 cup heart-shaped gelatin mold or cake pan
PREPARATION
Boil the water. Put the packaged gelatin dessert and unflavored
gelatin in a bowl and pour the boiling water over it, stirring
constantly. Cool to room temperature (very important or the next
step may present problems). Stir in the condensed milk. (They mean the evaporated milk listed in the ingredients. This is an error in the original book. - Britta) Note how it
already is acquiring the color of freshly skinned flesh.
Pour the mixture into the gelatin mold. Cover the bottom of the
mold (this will be the top when you serve it) with a layer about half
an inch think. Refrigerate until it gels firmly.
Meanwhile, prepare a nice bladder of blood. Stir together
the corn syrup, grenadine, and food colorings (we do it right in the
measuring cup to save dish washing--every erg saved in preparation is
an erg one can use to enjoy the Payoff). For the bladder (the bag
that keeps the blood together inside the mass of gelatin) take the
gallon-size food-storage bag and turn it inside out. Pour the
blood mixture into one corner of the bag and twist it closed so that no
air bubble is caught between the sauce and the twist. Tie a knot in
the twisted plastic. Adjust the position of the knot so that when the
bag lies on the counter, it's about 1 1/2 to 2
inches high, and tighten the knot. With a pair of scissors, snip off
the frilly extra plastic outside the knot.
When the gelatin on the bottom of the mold is stiff and firm,
position the bladder of blood in the mold, with the point of the
bag just inside the point of the heart. Make sure there is at
least 3/4" of space between all sides of the bag and the walls of the
mold (this will ensure that your guests don't see clues ahead of
time). Pour in the remaining gelatin until the mold is as full as
you can handle. Don't worry if you see a little of the blood-bladder
grazing the surface of the gelatin, as longs as it doesn't project too
much; the side you are looking at now will be the bottom when you serve
it.
Refrigerate until gelled firmly to the texture of fine, lean
organ meat. It takes about 4 hours.
To unmold, put about 2 1/2 inches of hot,
but not boiling water in your sink. Set your mold in the water so that
the water comes just below the edge of the mold for 15 to 20 seconds;
the time depends on the thickness of the mold pan. Remove the mold
from the water, and run the blade of a knife around the edge of the
gelatin. Invert your serving platter, ideally a white pedestal cake
plate, on top and hold it firmly in place. Then use both hands to turn
over the mold and the plate. Remove the mold; you may need to tap or
shake the mold slightly to free the gelatin.
PRESENTATION
The blood looks prettiest when it flows over white plates, doilies,
and table linen, which it may stain permanently--but what the hell,
it's the effect that matters. To serve, use a nice, big
Psycho-style chef's knife and stab the side of the gelatin about
one third of the way up from the pointed end of the heart. Twist the
knife slightly, and blood will start to ooze out. Bare your teeth like
a Marine jabbing with bayonet, and widen the wound. When the blood is
coming at a good slip, grab a dessert plate, and cut a slice from one
of the lobes of the heart. Flip it onto the plate, and drizzle it with
blood by holding it under the edge of the pedestal. Add whipped cream
and serve.
This dish delights all five senses:
A NOTE ABOUT SAFETY: Be careful not to serve pieces of the food-storage bag to your friends. They could choke to death. We want to help you become a more exciting host, not a criminally negligent klutz. If, on the other hand, you're deliberately trying to murder your guests, please think up your own modus operandi. Don't try anything that might implicate a couple of innocent fun-book writers.
Enjoy & Happy Haunting!