
As soon as I saw the Marauders' Map unfold when I was watching the Prisoner of Azkaban movie, I whispered to my friend next to me in the darkened theatre, "I see some new paper engineering in my future for my next party invitation!" ;)
Please keep scrolling down the page to see more photos of how my map folds and read about how and why I created it, including "behind the scenes" details!
|
My map download is now protected by a violent curse worthy of one of Voldemort's Horcruxes because of abuse by eBay sellers violating my copyright. I provide my map free for fellow fans for NON-COMMERCIAL USE ONLY. Sale or distribution of
this material is prohibited without my express authorization. If you violate my terms & conditions, the curse will get you. I watch eBay every day!
|
|
I had made a small and basic Marauders' Map for the first Hogwarts Celebration in 2002, inspired by how I had imagined a map hand-drawn by teenage boys would be, plus it was restricted by fulfilling the function of actually finding my apartment inside the huge complex I lived in at the time. My original map pales in comparison to what the Warner Brother's prop department imagined, how everything was enchanted by having the words create all the items on the map, including the walls and everything!
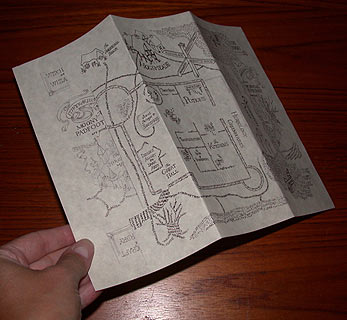
I procrastinated quite a bit in starting my new map, since this is definitely something that could have been done well in advance, and it had to be done plenty early anyway since I was including it in the invitation I sent via Owl Post, which needed to be sent 6 weeks before the party in mid-July. Unfortunately I kept having a mental block on how to fold it, since I really wanted it to be folded from a single 8.5x11" normal letter size sheet of paper, which would limit how clever the folding could be, but I was imagining at least two levels of unfolding before the full map would be revealed...
My self-imposed requirements were these: one single 8.5x11" sheet of paper, final folded size must fit into a 1/4 size envelope (meaning 1/4 of an 8.5x11" sheet), but without being too small. So, I started with scratch paper and started folding. I had the screen saver that Amazon gave when you pre-ordered the PoA DVD through them, which showed very cool unfolding, so I used that as my beginning model. After an evening of a couple hours playing with paper in front of the TV, I ended up with a final size about 1/8" shy on all sides, which fit in the envelopes well.
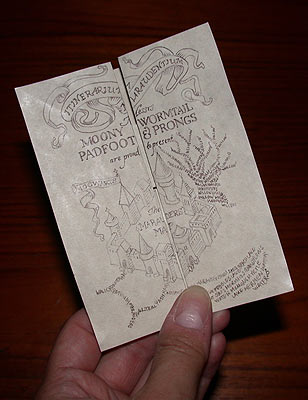
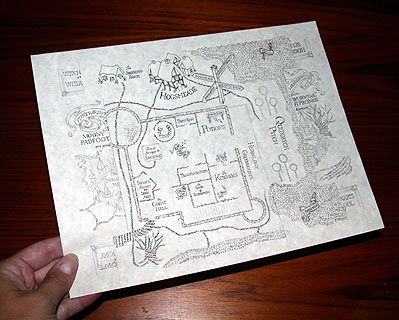
After the folding pattern was finalized on the scratch paper, I made a cleanly-folded master version on virgin paper, ready for drawing. To make sure the designs would match up after folding, I had to draw with the paper already folded, so I started by using the DVD package insert as my model to draw the front outside map cover. (Did anyone else notice that in the actual movie they blew it with "Mooney" but on the DVD insert they had corrected it back to "Moony" - heh!). That took a good evening while watching the Muppets Wizard of Oz...hey, that might be the first appearance of my Oz fandom on my website... ;)
Next I had a little trouble figuring out how to make the inner pieces meet properly for the lettering, since I was aware that all printers truncate about 1/4" in from the paper edge, so my design couldn't go all the way to the edge. This is a little tricky after you've folded so much it's hard to remember what the outer edges really are! I unfolded and sketched the border very lightly so I knew exactly where I was going, then it was fine.
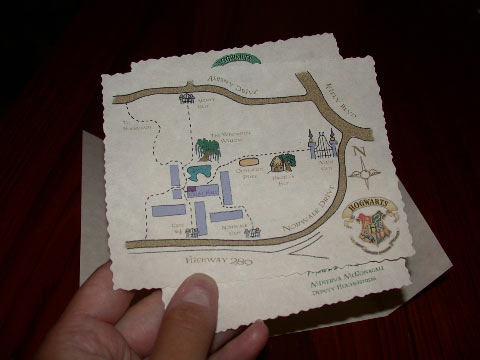
The inside was the most elaborate of course, since it is actually the floor plan of my house including the layout of which classroom decorations were to be placed where - remember I was drawing this before I actually decorated! - and even my yard layout. I did take creative license, since I live in a duplex (semi-detached house), so the lake is where the other unit shares the staircase wall with me. I had made a floor plan diagram of my place already when I moved in, so I had to sketch it out to fit the inside of the folded map, then take my creative license tweaking what I wanted to. After about 8 hours of drawing over a couple days, including going back over everything with a very sharp pencil to be as dark as possible, I finally had my final map! It was all really fun to draw, since I really miss having time just to draw, but I will admit the last hour of filling in "Forbidden Forest" was getting really old very quickly! ;)
This was rushed to finish over Memorial Day weekend when I was at my parents' house, since I no longer have a working scanner, and this really needed to be scanned to be able to print out at a high enough resolution, so I finished it to be able to use my mom's scanner. After a few test prints after scanning, I had my Photoshop copy on my laptop, ready for my own printer onto parchment paper at home. For some reason, Photoshop wanted to crop even though I made sure all the 1/4" blank space was to the edges of the 8.5x11" file size, so I had to "fit to printable area" which supposedly shrank it, but it printed out exactly perfectly. The PDF is a 6 MB color file, since I did test grayscale on the parchment, but that just looked like pencil on parchment, which was too boring for me. I tinted it all rust instead, which looked much more like the movie map, and in my opinion more like a quill pen drawing.
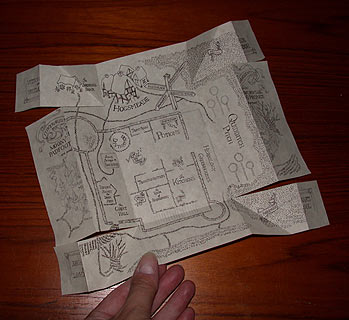
In case you were wondering, here is some explanation of details of the map. Yes, my fireplace "Floo Grate" really is a corner round "beehive" fireplace, but there is no tower - darn! My square with rounded corners coffeetable was where all the candy was, so that was the secret passage to Honeyduke's. Divination was on a round endtable, DADA was on top of my big TV, and Transfiguration was on top of my piano. There are liquid amber trees in the front yard, approximately where the Whomping Willow is placed. I wrote "secret staircase to staff quarters" on purpose in hopes people wouldn't go upstairs which was off-limits to party guests. Aragog and the Ford Anglia are hidden in the Forbidden Forest which is where my raised flowerbeds are, where I was hoping kids wouldn't venture for their own safety because of the prickly roses and blackberry bushes. Hogsmeade was where the kids area was, which was Hogsmeade Elementary School, the Quidditch goalposts were in the grass, Herbology was on the patio, the kitchen is really the kitchen, Potions was in the dining area, my china hutch was the Trophy "Room," and the Sorting Hat really was in the foyer Great Hall. Yes, the Giant Squid is even in the lake! The funniest joke that only some people got on their own was that the Room of Requirement with the Blue Lady painting on the door to get in was my guest bathroom - remember Dumbledore's chamberpots? Of course I drew this map pre-Half-Blood Prince, where we found out the Room of Requirement doesn't appear on the Marauders' Map...oh well!
Now, onto the cutting & folding instructions. The folding is complex enough that you really need to pay careful attention to your creases or the drawing doesn't meet up properly for the design. If you have origami experience like me, that helps immensely, since you'll already know that quality origami is all about accuracy and precision. Even though I couldn't ever get quicker than about 5 minutes per map, cutting & folding included, I folded all 80 maps that I used for my invitations, since I wanted full quality control myself. I had worked so hard on the drawing that I wanted to be sure the final results met my high expectations! ;)
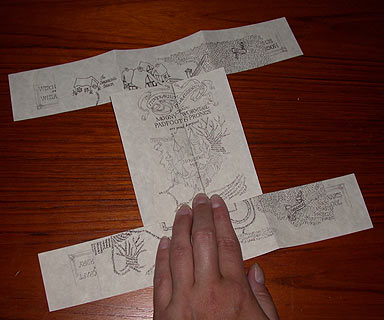
1. Print out your map on a sheet of 8.5x11" parchment paper.
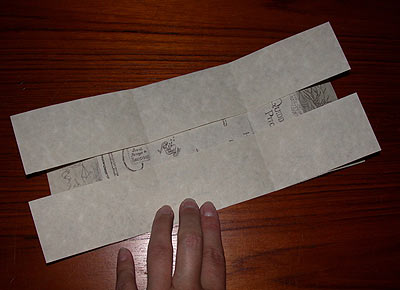
2. Find the faint lines near the edge of the patio and the Honeydukes coffeetable to make gentle mountain folds (fold backwards) in approximately thirds lengthwise. Do NOT crease these folds!
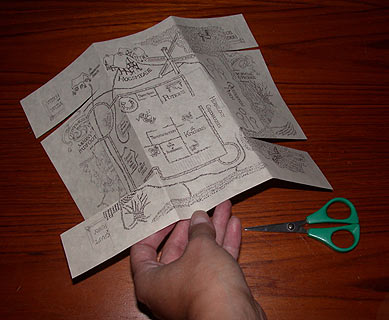
3. Find the faint lengthwise lines that mark the outline of the front cover image and cut only to where you just folded. You will notice that on this cut line, the design doesn't match anywhere until after it's folded into the final pattern.
4. Find the faint lines that mark the inner edges of where the front covers meet in the middle. You will see that the design changes at the same line. Make mountain folds on those lines.
5. Bring the last two mountain folds together to meet in the middle. Carefully adjust the middle until the design meets, then press down to finger-crease the outer edge folds. Don't worry about a crisp crease yet, since you still might have a final adjustment at the end.
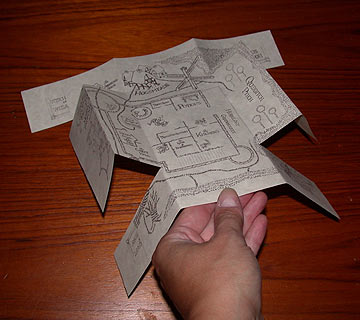
6. Turn over and you'll see your top flap edges hang over the folds from the back view.
7. Trim the front cover flaps either now, or you can wait until after the final folding.
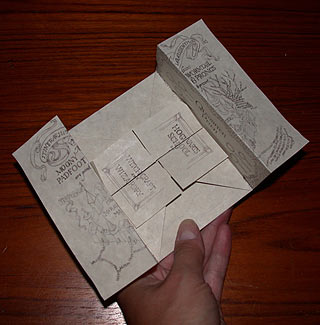
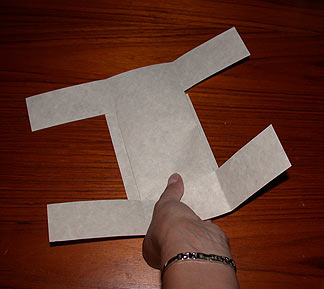
8. Turn back over so you see the drawing again. Unfold the front cover you just folded so it is out of the way. Use the cross-marks where the inner ends of the cuts are to fold the top and bottom strips across in valley folds as shown. Your original gentle mountain folds should meet up with the side folds of the front cover. Adjust a little if necessary, since sometimes the cuts can end in slightly different places.

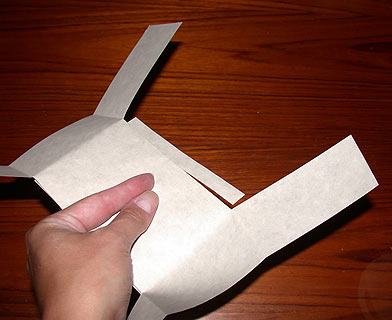
9. Find the faint lines and design edges for the Hogwarts School of Witchcraft and Wizardry lettering on the edges of the horizontal flaps. Mountain fold all four ends as shown.
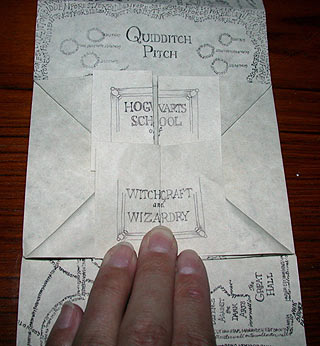
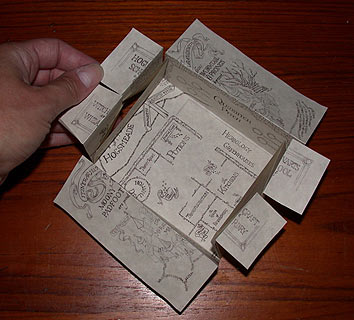
10. This step is a bit tricky. Take the pair of end flaps from one side that match together, i.e. "Hogwarts School." Pull the flaps around so that the folded edges meet and the lettering matches up, then gently smash down so you end up with the angled folds, taking care that you don't stress the corners so much that they rip. This will require some adjusting of the angles and the edge where the front cover will fold over this section. Your priority is that the lettering matches up with the front cover still able to fold over everything, since you can trim the other edges for a clean look. Repeat this with the other side lettering so all your lettering meets in the middle now.
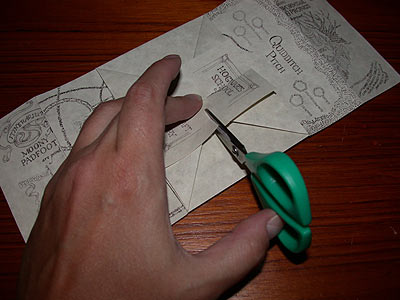
11. Due to the paper printable area, you have overlap at the middle, so make a cut through all the flaps as shown to trim the overlap, but be careful you do NOT cut through too many layers. You do want to cut through the angled folds, but you want to be careful not to go through the other side, so it's easiest to cut from the outside in for each side. Depending on your cuts (and how much you care!), you might want to open the map back up and trim all the way across to have a clean final exterior edge when unfolded. Yes, I painstakingly trimmed all my maps because I'm that picky. ;) It helps the map stay flat to use a folding bone on the school lettering layer before folding the whole map.
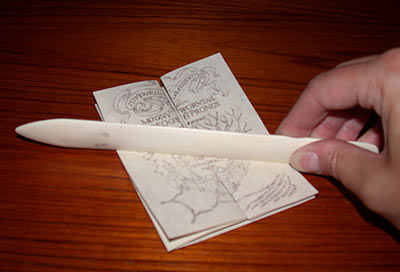
12. Carefully fold everything together, making sure that you haven't caught anything misfolded inside. Holding the front cover together to be sure the design meets properly, then use a folding bone to make crisp folds and to help keep the map flat.
Voila! My own Marauders' Map!